Best of Domefest 2009 at Morehead on Feb 17

February 10, 2010

DF09_smFor a bunch of reasons, we weren’t able to make it to Domefest 2009 this year. Missing it, as you might guess, really sucked. After being so inspired by all the great content we saw in Chicago in 2008, we were really looking forward to the 2009 gathering. We saw all of the finalists on the Domefest vimeo channel, but it’s just not the same on a flat screen.

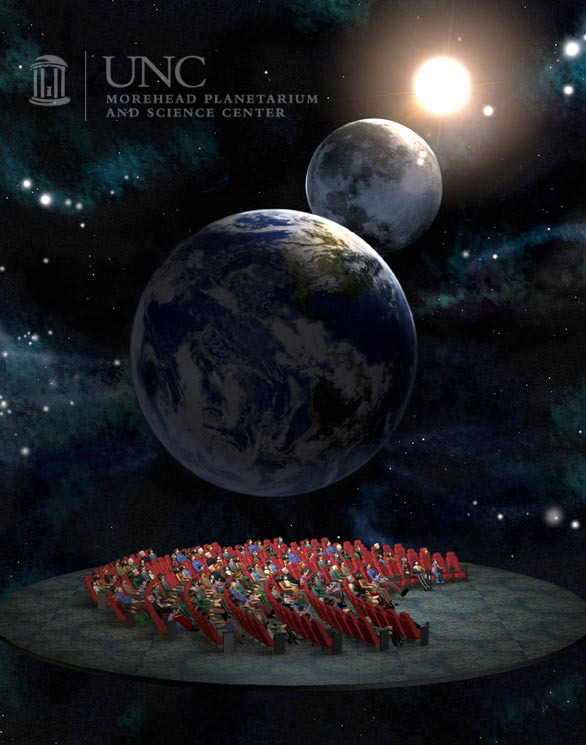
So instead, we’re bringing Domefest to us. Morehead is taking place in UNC’s CHAT Festival (CHAT is “Collaborations: Humanities, Arts & Technology”) this year. As part of that we’re going to be showing the Domefest 2009 winners on Morehead’s dome on Wednesday February 17 at 7:00. If you’re local and want to check it out, let us know.


We’ve finally gone digital in our dome.

January 29, 2010

We’re putting the finishing touches on converting our theater to a 4K digital fulldome system from SkySkan. As far as I know, we’re now the largest fulldome theater in the Southeast US. We’ve been waiting for this day since I started working here three years ago. And it’s been talked about for over 10 years! In fact, it’s been so long that the guy who started talking about 10 years ago, Holden Thorp, was then the director of the Planetarium. Now he’s the Chancelor of the entire school of UNC-Chapel Hill.


Our official reopening is going to be February 5th. On the docket is “Astronaut” from NSC and “Black Holes: Journey into the Unknown” from Museum Victoria. We’ll also be playing our own homegrown show, “Earth, Moon and Sun” and a live show called Carolina Skies. We’ve also got the Domefest 2009 shorts that we’re going to play during special occasions AND we’re weeks away from finishing our second show, “Magic Tree House: Space Mission” and a domefest short entitled “Jeepers Creepers.”  Yeah, it’s a bit busy, but we’re pretty psyched.

Character Sketches

January 11, 2010

Starting on our new show, we begin with our most favorite (mine anyways) portion of the production process:


Pre-Production!


With our script getting a coat of finishing wax, our characters have been essentially locked down. With no major changes to be made to them, we can begin our character sketches! The following are some examples of our rough character concepts. The next step would be to make more locked down turn-arounds when we move onto the modeling in our 3d program of choice.


Sound Design?

January 7, 2010

41pBhfgzCoL._SL500_AA240_Because dome shows are mostly 3D animation, making planetarium shows is closer to creating cartoons or video games than live action films. Therefore, most of the sound effects have to be added in after the visuals are created. The arrangement and layering of these sounds is called sound design.

I was looking to get a little more education on doing sound design for film, whether it be from a class, books or some old sound guru who lives on a mountain top somewhere. It’s not easy to find info out there. And I work on a University campus, so you’d think there’d be some resource available. Nada. Nothing. If anyone has any thoughts or suggestions, lay it on me. I’m not talking the basics of audio editing, I’m talking full-on film sound design.

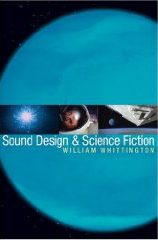
One book I did find that was interesting, however, is “Sound design & Science Fiction” by William Whittington. It basically talks about the evolution of sound design and how the 70s sci-fi movies such as THX-1138, Star Wars, Alien and Blade Runner revolutionized the business. And pretty much the leader in the revolution was Lucasfilm’s Ben Burtt. Thirty years later, he continues to be the leader in the biz – he did the sound for Wall•E. If you’re interested more in the sound design and foley work that was done for that film, check out this talk he gave about it as well as this website – Ben Burtt Interviews.

Awesome After Effects tutorials

January 4, 2010

The following is a wonderful source for after effects ideas, and production assets. If you’re making full dome content chances are you’re using Adobe after Effects because of its support for 4k compositing, and because its fairly easy to use. Andrew Kramer has a quirky sense of humor in all of his tutorials, but also does a great job explaining process, and some excellent design ideas and procedures. Anyone who’s asked me questions about understanding the program I usually point them to this link.

and for good measure, http://videocopilot.net/

The tutorials have been free, but some of his production bundles are worth taking a look at. For someone new to After Effects there are some great starter tutorials, and for some of us more advanced types he’s always coming out with some new and challenging material.


Fulldome Festival in Germany

December 18, 2009

fulldomefestival09We just entered our first production, Earth, Moon and Sun, into the 2009 Fulldome Festival at the Zeiss Planetarium in Jena, Germany. This year, they’re allowing full length shows to be entered into the competition. Previously, the competition was limited to shorts under five minutes, just like DomeFest. I seriously doubt our show will dovetail into their theme this year, “Bauhaus-in-the-Stars,” but we’ll give it a shot anyway.

The english version of the site is a bit confusing and has some dated material, so the best place to get clear info about the festival is actually on the Zeiss website here.

LowPoly Model for High poly crowd

December 7, 2009

We’re working on an experimental short that is designed to help us break the daily grind of working strictly on planetarium shows. The short is intended to be entered at DomeFest. An interesting challenge has arisen as we try to generate a crowd that should ultimately cover the dome surface.

My number one priority was to make sure the object that was to be duplicated thousands of times was as lowpoly as I could get it. LowPoly, reffering to an amout of the shapes known as polygons that define the shape of a computer generated model.

The resulting insect is based upon the anatomy of a pill beetle.

bugRendered

This doesn’t look like much up close, but its intent it to be very small. I was able to make this bug for less than 1000, polys.

bugWireframe

But when you’ve got 5000 on the screen at one time, then you’re talking about close to 5 million polygons, all being animated. The bugs legs and antenna had to move. We couldn’t just have them sliding around being pushed or dragged by some imaginary force. All of that information can cause some instability in the scene, so to make life even easier I worked with smaller crowds and plan to layer them up to appear as one large crowd in the final composite.

This  one bug was duplicated multiple times and simulated in a crowd simulation.


The Following animation is a short test showing a crowd of 500 bugs approaching a dome structure.


Render Computers vs Workstations,

November 30, 2009


DeadlineMost network rendering engines can access the cmd line functions of multiple software packages and run their rendering engine without requiring costly licensing. (For Example, After effects, Combustion, Maya, 3dmax, etc.) As long as you have a workstation license you can install and operate these on as many Rendering computers (slaves) as you’d like. Other Software, and namely plug-ins, require licensing, and make a distinction between Slaves, and workstation functionality. Plug-ins like Mental Ray, Render man, Final Render, Trapcode, Vue, and Dreamscape, require licenses for each slave, and sometimes per processor in the slave. You can imagine with 3 workstations and 23 slaves, each containing 2 cores, and 8 processors the cost can start to get a little extreme.

WorkStationRenderSlave

So the above mentioned software providers are leaders in the industry, and even with the proper licensing, there can still be hick-ups in the installation of the software onto the slaves, and getting all of the tools to talk with each other and work properly. That’s if you were working in a flat screen. Most of the above mentioned tools were developed to be primarily used on standard flat image. Take into account adding a level of complication like Full dome rendering, and you’ll find yourself with even a larger set of hurtles to overcome. There is a wonderfully active group in the full dome community. They’re busy creating tools, and plug-ins to make our work flow easier and more streamlined. The main issue is these tools are free and generally work as Workstation only mode, and quite often software version specific. Some major software providers are acknowledging the full dome application of their product and have looked at these tools and started to integrate them into their products. Hopefully this trend will continue, and accelerate as full dome video becomes more popular.

As a content creator on a small staff, one spends a vast majority of their time making sure the slaves are doing their jobs. Sometimes its easier to do things on a workstation, but it can take an awful amount of time.

Morehead is now a member of IMERSA

November 25, 2009

header_bkg Morehead just became an Institutional Member of IMERSA (Immersive Media Entertainment, Research, Science & Arts). Their website is in the midst of a redesign at the moment so some of the links are grayed out, but word is that there’s a new site coming down the pipe.

According to their website,  “IMERSA is an international professional association advancing the art, science, profile, integrity and common interests of large-format digital immersive media and group interactive entertainment and cultural experiences including (but not limited to) immersive digital theaters and digital dome (fulldome) planetariums.”

We’re pretty psyched to finally join up with this crew. It’s been our intention from the beginning to get more involved in the fulldome community. This blog was the first step and joining IMERSA is the second.  Hopefully we’ll be able to help shape this new medium for good and not evil. Although evil is fun…and speaking of evil, we’re just about finished up with our first fulldome short and it’s very eeeeevvvvvillll. More on that later…

Trax Editor and Time Warps: Part 3

November 24, 2009

So we animated our character, created a cycle in the trax editor, and increased the number of times that our cycle will repeat. When we look at our trax editor, we should see something like this, where we can see the length of our original cycle, and the number of times the cycle repeats itself. It’s represented through the lighter colored ‘phantom’ cycles.

TraxEditorClipCycle

Here’s where things are going to start to get a little weird. You may think at first that now you can apply the time warp, as I had thought myself. But the time warp only affects and represents the cycle, it does not include the post-cycle repeats.

CycleTimeWarp01

CycleTimeWarp02

Since the goal is to have our character slow down and then speed up again, we’ll need to make this one long animation clip. We can do this by merging what we have, making it a new animation clip. We’ll want to select our clip and go to:

Edit > Merge > Dialogue Box

TraxEditorMerge

Now we can pick what we want the name for our clip to be. We can just leave the Add to Trax radio button clicked so that the trax editor will be automatically updated with our new merged animation.

MergeClipOptions

With our new merged animation, its time to do some speed adjustments with time warp! Go ahead and select our clip and go to:

Create > Time Warp > Dialogue Box

TraxEditorTimeWarp

Go ahead and hit apply (Option to Enable Time Warp Curve checked), and open up the graph editor to check out our new keys for the time warp. With the animation clip selected in the trax editor go to:

Window > Animation Editors > Graph Editor

And select the Time Warp in your clip so that we can see just those keys.

TimeWarpGraphEditor

Having applied a time warp to the clip, Maya will automatically create two keys. No matter how long you were wanting your animation to be, there will always be a key at 0,0 and 100,100. What’s very important to know is that this represents the percentage of the clip. The X axis is no longer represents the frames of our animation, but the percentage value of where we are in the trax editor clip. Frame 25 in the graph editor is 25% the way into our clip. Frame 75 is 75% into it, and frame 100 is the end of the trax editor clip, or in other words 100%.

The same happened to our Y axis. The Y axis has switched to percentages now, and those percentages represent the animation inside our trax editor clip. When the X represents what time the change happens in the clip as it plays, the Y represents the progression through the animation inside the clip.

So we have our normal graph here:

TimeWarpGraphNormal

We’ll never want to exceed 100 on the X axis, as you can’t have greater than 100% of the clip. If you were wanting to suddenly halt the animation halfway through, it would look like this:

TimeWarpGraphHalfway

What this says is that once we reach the halfway point of the entire clip, we will no longer progress through the clip. Even though we’re still continuing along the X axis, the animation inside the clip is holding at the 50% mark, or the halfway point in the clip.

If we want to double the speed with no variation, we would make our last key end at 50,100.

TimeWarpGraphDoubleThe reason it ends at 50% on the X axis, is because it’s moving double the speed, it will reach the end in half the time.

If you were wanting to get fancy, and have your animation halt, ease to moving in reverse, and then suddenly going forward while easing into a halt, you’d look at something like this:

TimeWarpGraphGoesCrazy

As you could imagine, this unfortunately can’t be an exact science. If you’re needing to be very precise on which frames you want to have these speed ups and slow downs happen, I would recommend making your animation clip divisible by 100 to make the math simple. Hopefully this will help you if you’re a little lost with using time warps.