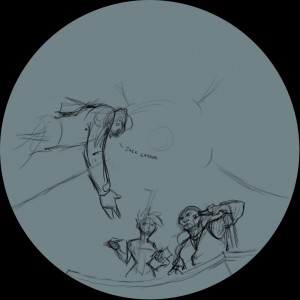
Scratch trax

June 3, 2010

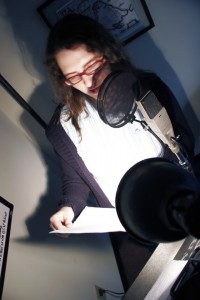
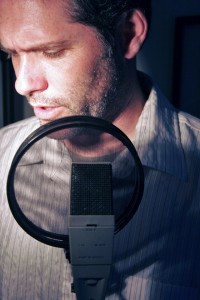
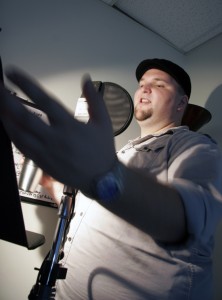
We’re smack dab in the middle of storyboarding out our new Solar System show so that means it’s time to start on the audio.  Which is good because I’m tired of sitting back, lighting cigars with flaming $100 bills and laughing manically. First step is to get some scratch tracks of our characters down so when we move on to animatics we can have some idea of timing. It’s also proving to be helpful for us to have an idea of how things will sound and how they should be acted when we get the real voice actors in on the job. In the meantime, we grabbed some great amateur voice over actors from Morehead and let ’em loose on the script:


Jonathan Frederick as Space Captain Jack Larson


Peter Althoff as Billionaire Warren Trout


Carly Apple as Ashley Trout


Jim Kachelries as Beemer the Robot


Laura Walters as Capcom

Morehead’s Artist in Residence

May 28, 2010

For the past year, Morehead’s been working with an Artist in Residence, David Colagiovanni, who has been not only creating new content for the dome, but thinking more in-depth about how we use and interact in the dome environment.  David’s a professor in the UNC-Chapel Hill Art Department and we’ve stolen him away to work on dome stuff in his free time.

Last month, he presented his work on the dome to a packed house and we’ve convinced him to stick around for another year and push some of his ideas even further. Meanwhile, we asked one of our multimedia students, Colby Ramsay, to put together a short documentary about David and his work on the dome. And for all you gear heads, yes, he’s using the RED Camera. Check it out:

Storyboard Continuation

May 19, 2010

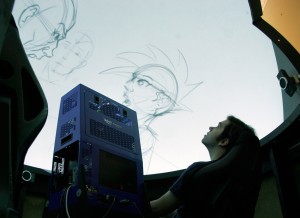
The first blog post I made I talked about making storyboards for the dome. To give a better idea what I’m doing, Jay was kind enough to take a picture of me in the process of making one of the boards for our next show solar system show.

What’s interesting about this process in the dome, is not only the challenege of imagining the scene and positioning the characters in the false 3D space, but the relationship and staging of the characters in the 2D sense. What my good friend and collegue Pete would say is that even with using 3d software like Maya or even 3d comps in After Effects, you’re still creating a flat image for film.

I apply that philosophy when boarding in the dome, trying to make the board pleasant across the whole surface for layout and staging.

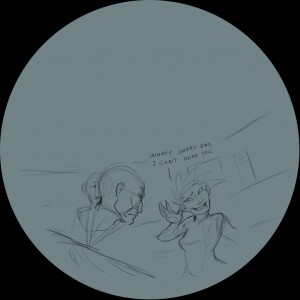
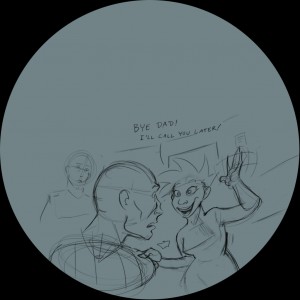
There are some advantages and disadvantages to making boards in the dome versus flat, uncurved surface. An obvious disadvantage is that having access to a projector and dome is not a readily available option. Drawing on the dome also takes a little getting used to. What we’re seeing in the picture is myself drawing in the open source program Gimp, on a 1024×768 canvas, to match the projector’s resolution. When in full screen mode, I’m able to adjust the positioning so that it covers the whole dome surface. Since the projector has a correct distortion to fit the curved surface, I need to match that while drawing in Gimp. The result is a correctly distorted image, that will show up properly on the dome. Here’s a couple of examples of finished frames.


In this sequence our heroine is hanging up on her holographic father. This sort of board is a little more flat than what they normally would look like, as there aren’t any extreme angles. It would be very feasible to even make boards like these without the use of a dome to project on, just needing to remember where the front, right, left, and back positions are.

This is a more extreme example. This particular board would best be done inside the dome environment.

The advantages are obvious, there is no guesswork, and the director would get to know exactly what the shots will look like before its brought further down the production line. A frequent question asked when boards are made on a 4:3 or widescreen is, “Well what’s the back look like?” This method is a way to show what that back actually would look like, or a close aproximation to.

Earth, Moon & Sun wins Honorable Mention at Jena Fulldome Festival

May 12, 2010

Fulldome Fest Honorable MentionWe just heard the news that Earth, Moon & Sun earned a 4.0 rating (out of 5) at the 4th Jena Fulldome Festival, an international showcase in Germany. EMS also received an honorable mention for best use of humor. Not too shabby for our first fulldome show!

Next stop on the festival circuit is the Fulldome Film Festival that follows ASTC in Honolulu in October.  We’re planning on entering Earth, Moon & Sun and our newest show, Magic Tree House: Space Mission.  I think I’m going to mail myself out there with the hard drive.

Head in the Clouds

April 26, 2010

Conjure the image of a cloud, shouldn’t be too hard… Except now take that white fluffy cloud and try to imagine it “cartoony”, this became a bit more of a challenge. We are going for a non photo-realistic rendering (NPR) style aka Toon Rendering for this next piece. This created a challenge for developing atmospheric effects such as clouds. Bellow are a few of the screen tests we’ve done to determine which look and feel we’ll go with.

MoreRealistic

This is a digitally created representation of a very real looking set of clouds.

Realistic

this is a similar, yet slightly altered state of realistic clouds. In it we pushed the fluffy askpects and made them more solid

PainterlyClouds

This is what we are calling “painterly” clouds. He we are playing with what feels like a cloud, even though they don’t look realistic.

SuperCartoony

This is “cartoony” representation of clouds, that is close in style to the other hard surface elements of the show.


Although the “cartoony”  clouds are the most consistent with the visual style, we are leaning toward the painterly set. The issues that exist with moving through the cartoon clouds would result in hitting  hollow point inside these empty objects. Not to mention they’re rather resource intensive. They contain millions of polygons, that when rendered take up valuable processing time. We also realized with the painterly clouds we want people to feel as though they’re traveling through the familiar into this flat “cartoony” world, and since they feel like a real cloud, they will be accepted as such.


Art on a Dome

March 29, 2010

We here at Morehead have been working with a local talented artist who’s been exploring the notion of projecting art onto surfaces. Where from my understanding his goal is to take two things that were incomplete on their own, and combine them. This process changes both pieces and creates something new. Now as a compositor who takes many things and figures out how to make them work together, its definitely something I can relate to.

Working with him and helping him figure out how images translate from flat to full dome has been a journey for us both. He’s been taking concepts that have become somewhat standard in our productions and wanted to create real footage equivalents. The images that have been generated are certainly abstract. The visual interests of taking seemingly simple concepts like capturing food coloring in water, have produced vivid images with very natural and somewhat unexpected movements.

E052_C002_0223QV_F copyA040_C001_0215SX_F copyE048_C001_0223QF_F2 copyE048_C004_0223GA_F3 copy

As he progressed in his visual experiments the compositions and staging became a bit more deliberate, but still contained the organic nature of the subject matter.

The final piece is scheduled to be shown April 17th as a repeating 10-15 minute  presentation for viewers to experience at their leisure.

Magic Tree House: Space Mission in the bag

March 11, 2010

mth2

We just finished up our second full dome show called Magic Tree House: Space Mission. The show is based on the popular children’s book series Magic Tree House and is written by Will Osborne. We’ve been showing an analog version of MTH at Morehead since 2004 but it’s so popular that we decided to convert it to digital.

The audio track remains similar, although we added a few new SFXs, switched out one of the main character’s V.O.s and mixed it in 5.1 surround. But we didn’t do a typical digital conversion for the visuals. We essentially rethought the visuals from scratch, making the show much more interesting to watch and utilizing the full capacity of fulldome video.  The trailer is coming soon!

Slicing and Dicing

March 4, 2010


The brand new projection system is installed, and now we’re ready to take some content and test it on the venue its intended for. I’ve got my 4k dome masters that I’ve so painstakingly slaved over, and I can’t wait to see them projected across a 60 ft surface… … … now what?!

Dome_Master copy

The Process for preparing a “dome master”  for the dome is called ” slicing”. This takes a large 4k image breaks it apart for your particular projection system.  For example we’ve got two projectors, some people have 4, an I think they go up in even numbers from there. What ever the Configuration you’ll need to feed each projector with its own specially distorted version of the original dome master.

2Projectors

For us, even though we have 2 projectors, each projector needs 4 feeds. So this results in 8 individual feeds of images. The software provided by our full dome facilitator will take our image sequence of the dome masters and cut it up into 8 individual image sequences.  Then those sequences get put into an mpeg video with appropriate audio to be synced with a master Audio Track.  This process is fairly lengthy as the slicer can process 1000 frames per hour. Though luckily you can use multiple computers to do the slice, but when it comes to processing the mpegs you’ll become limited to 8 individual machines.

eightfeeds

After that, then you can take your 8 video files and push them to the slaves that run the projectors, get them all synced up, and finally watch your full dome content… Its amazing, its fantastic, its got an odd flicker happening on some geometry about 30 frames in and lasts the rest of the shot.  On a 4k system you can see any technical blemish you may have missed. At that point you go back to your desk, cry a little, and start all over.


Final sound mix tips

February 18, 2010

We just finished production on our latest show, Magic Tree House: Space Mission and now it’s time for the surround mix. While we usually do the sound design in-house, we decided it would be much more efficient and cost effective to send off our surround mix to an outside house. So we send it off to Alex Markowski at Audio Kitchen Post who does a mix in his studio and then comes over to our dome, plugs into our surround speakers (and brings his own) and does a final mix.

If you’re new to producing digital content and don’t know some of the details of what to do once you’ve finished the sound design (or if your surround guy is new to planetarium mixing), here are some tips:

1. Exporting for the mix – OMFs

Because your sound mixer may not use the same platform or application that you used to do sound design, you’ll probably be asked to export an OMF.  You may be thinking, “WTF is an OMF?” An OMF is basically all of your sound clips and timing information in a generic format that other programs can use in one large file. Your mixing person can take this file, import it into his application and tweak away.  *IMPORTANT* – Apple’s Soundtrack does NOT export as OMFs (it does export AAF’s but that’s a different story). I’d suggest just using another program if you’re using a Mac such as ProTools LE, Logic or even just Final Cut.

Before you export, make sure your tracks are organized in groupings (dialog, VO, music, sfx). Levels, pans and filters cannot be exported as part of an OMF so it is important to have a….

2. Guide Track

When you send your mixer your video domemaster for reference (make sure it’s not 4K or it’ll be a pain in the butt – shrink it down to 1K), export your audio (the guide track) as an aiff and attach it to the video or send it as a separate file so that the mixer has a good sense of what you’re trying to make the audio sound like.

3. VO in the dome

Normally when you mix VO for 5.1 surround in a movie theater, you put the voice in the center channel and then just a bit in the left and right. However, in the dome, it’s usually good to bring the VO up in the left and right (about -3db from the center level). This way, when sitting in the left part of the theater, it prevents the VO from sounding like it’s coming from the right part of the theater and vice versa. Let your surround guy know.

4. Do the final mix in a dome

Don’t trust your headphones or your fancy-schmancy Alesis monitors. Things sound very different in the dome. There’s a lot more reverb and subtle sounds can get totally lost, especially in a big dome. Have your sound guy set up a computer in the dome and plug it into your surround system or set up his own speakers. That way you’ll get the real deal.

5. The Final Files

Here’s what you need from the final mix:

  • 5.1 surround mix (6 files – Center(C), Front Left(L), Front Right(R), Back Left (Ls), Back Right (Rs) and Low Frequency (Lf))
  • stereo mix (2 files – L and R)
  • a 5.1 dialog and M&E (music and effects) mix  – this is so you can hand it off to a planetarium in a country that speaks another language and they can replace the dialog track with their native language.

Is there anything else you’ve had to deal with or keep in mind? If so, let us know and we’ll add to the list.
Designs of the Future

February 15, 2010

As we get deep into preproduction and asset creation for our next Fulldome show, a key piece of equipment they’ll be using in the reality we create is their ship. After a long period of distilling down ideas from classic rockets, to the more realistic shuttles… We settled on something reminiscent of a fighter jet mixed with a flying saucer. ShipSketchblockedOut

The big issue we’ve been considering is scale… Just how big should it be. Originally the thought was that it shouldn’t be much bigger than the existing shuttles that go into space. But proportionately the cockpit would have been just under 18 feet wide as displayed in this first drawing.

ChairShipcockpit01

We quickly blocked out the dimensions and started some camera move tests. It was just feeling too cramped. So we went bigger.

Cockpit_conceptSketch02

Changing the diameter of the cockpit to something closer to 30 feet gave us a lot more space for the characters to be able to move around, and allow our camera to move a little nicer through the scene. With larger more graceful motion paths.  Also allows us to mix up where the characters will be standing in the environment, and giving us a little more bang for our buck. Who says you can’t fly a skyscraper of a ship into space… it’s the future, right?