New Fisheye Lens from Canon

April 1, 2011

Ok, so this isn’t necessarily brand new news (it was announced in August 2010) and the lens isn’t even available for purchase (B&H says May), but you can at least start to get excited. Why? Because Canon is coming out with a 180 degree fisheye lens for all of its EOF SLRs.

For those of you already out there shooting with a 5D Mark II, just pop on this lens and you’re ready for popping off frames for the dome. No adjustment necessary (theoretically). Now you’ll be able to shoot time-lapse or stop motion with your favorite camera.

I’m psyched and planning on selling one of our interns to the North Koreans so we can get one.

But keep in mind that this isn’t going to solve the 4K video on the dome problem. The 5D still only shoots 1920×1080 so the best you could do is shoot video for a 1K dome but if you’re shooting stills you’re looking at 5,616 x 3,744 frames, which is big enough for a 4K show.

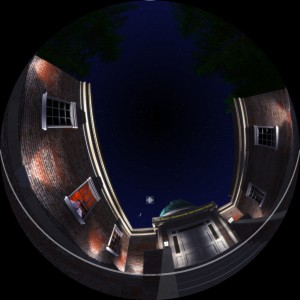
Here are the sample images from the Canon page about the camera:

Full-frame fisheye:

Circular fisheye:

24 Hours of One Day in a Photo

January 28, 2011

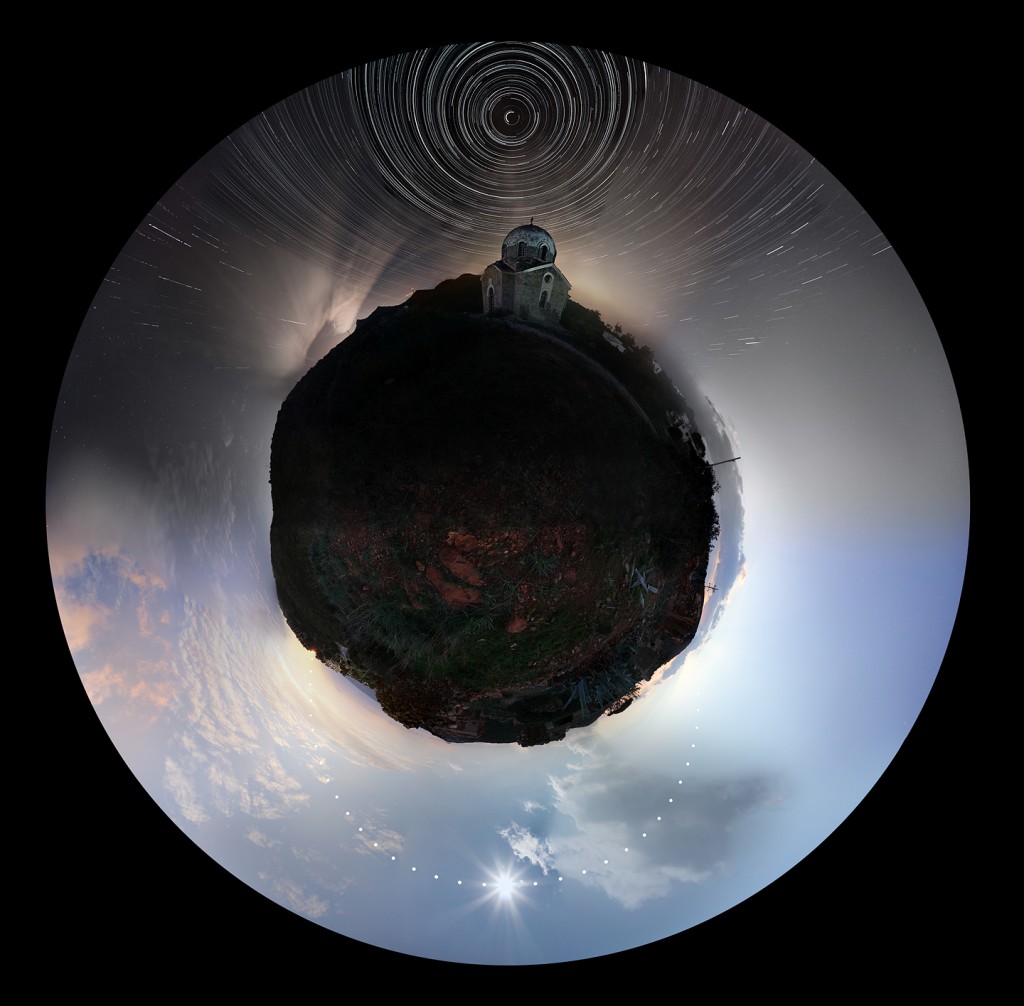
This image is amazing and looks like it’s ripe for the dome. It’s even already in a dome master. Someone out there should work with this guy (Chris Kotsiopoulos, who lives in Athens, Greece) to make some interesting content. A little background, this is how Chris says he did it:

After wondering for some time whether it was possible to image the sky from one morning to the next where I live in Athens Greece, I decided to give it a try. After hours of planning and preparation, and a full day of shooting, the image above is the result of this labor of love. It took me about 12 hours to pull together and process a single image that included over 500 star trails, 35 shots of the Sun and 25 landscape pictures. My plan was to make the image on the day of the solstice (December 21) when the Sun’s stay in the sky was short (in the Northern Hemisphere) and the star trail durations were long. Of course, trying to find clear weather for a given 24-hour period is not an easy chore. However, I was patient, and the weather eventually cooperated (on December 30-31, 2010). I had to stay at the same place for approximately 30 hours. In addition, I was on location 2-3 hours before sunrise in order to make the preparations and test shooting. I also needed to stay an extra 2-3 hours the second day so as to shoot part of the Sun’s sequence that I lost the first morning due to clouds. I chose Sounion (Temple of Poseidon) as the setting for this project. Click on image to see labels.

I began the shooting the morning of December 30, 2010, taking photos with my camera on a tripod facing east. The day portion of this shoot is composed of a dozen shots covering the landscape from east to west as well as the Sun’s course across the sky, from sunrise to sunset. I recorded the Sun’s position exactly every 15 minutes using an intervalometer, with an astrosolar filter adjusted to the camera lens. In one of the shots, when the Sun was near its maximum altitude, I removed the filter in order to capture a more dramatic shot that showed the Sun’s “glare.” After sunset, I took various shots with the camera facing west-northwest in order to achieve a more smooth transition from the day portion to the night portion of the image. The night portion is also composed of a dozen landscape shots but this time from west to east. After the transition” shots, I took a short star trail sequence of approximately half an hour duration, with the camera facing northwest. At 7:30, I turned the camera to the north and started taking the “all-night” star trail shots — lasting almost 11 hours. After accomplishing this, I then turned the camera to northeast and shot another short half an hour star trail sequence, and then finally, with the camera now facing east-northeast, I took a series of night-to-day transition shots.

Are the folks at the Athens Planetarium producing content? Get this guy on your team.

(Gizmodo via EPOD)

Jeepers Creepers at Fulldome UK 2011

January 26, 2011

Our first fulldome short, “Jeepers Creepers,” will have its world premiere at the Fulldome UK 2011 festival in mid-March. We’re pretty psyched because it will be the first time anyone will see the short outside of folks from Morehead. I won’t give away the premise, suffice to say that if you’re not yet afraid of insects, you might be after it’s over. Pete wrote a short blog post about it when we were in the development phase to give you a little sense of the plot.
Fulldome UK 2011 is being held at the Thinktank Science Museum in Birmingham and has some interesting dome content lined up and some great looking sessions such as shooting with a RED for the dome by a pro steadicam operator, “Storytelling in the Dome” by NSC Creative and “Adventures in Fulldome cinemetography” by Phil Mayer from GaiaNova.  Who wants to buy me a plane ticket?

Camera Rig v2.0

January 24, 2011

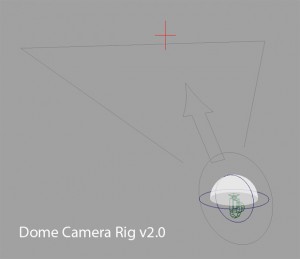
In an older post I talked about the camera rig we use for our planetarium shows. I also uploaded it incase there were some people that wanted to use it as a springboard or to get ideas of how to make their own.

Well in light of Pete getting a fisheye lens to work, I went ahead and updated our rig.

Here’s our brand new camera rig with all the bells and whistles. Able to switch between the FK system in the old camera rig, and an aiming constraint for the young at heart. A non-renderable dome sits on top so that you can get a sense of what will be visible to the audience. There’s also another camera which can used to look around via aiming constraint for playblasting animation.

These were made in Maya 2008, but could easily be brought into newer versions.

5Camera

Fisheye

And lastly, both of them zipped together.

Toons, Ships, and Shaders Ahoy!

January 13, 2011

Recent work on this project has produced a wonderful revelation. I’ve been working almost exclusively in Maya for this project, and this is a big deal for me because I’m traditionally a 3ds Max guy.

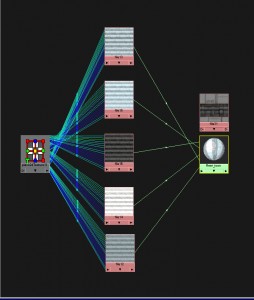
One of the hurtles we had created a work around for was the toon shader and how it reacted to lighting scenarios. I discussed this in my previous blog post “Have it both ways.” Since we don’t have a R&D team we make our developments on the fly. I recently discovered you could use 1 image file and then duplicate it in Maya and alter its color gain to create the various levels of shading in the toon shader.

Then I took it a step further. I started tinkering around and discovered something that simplified our production by reducing our render passes.

I realized you could take a toon shader and plug that in as the color value of a standard shader, thus having your cake and eating it too.

Have it both ways

December 16, 2010

With this next project, we’re trying something a little unconventional. Something to try and spice things up a bit. As if generating fulldome content weren’t difficult enough?

One of the problems we ran into using a toon shader is that it doesn’t accept lighting color information or calculate shadows very well.

So, by taking a color pass and a grey scale pass you can combine them and season to taste.

The final test result is what you see here.

The Joys of Wrap Deformers

December 7, 2010

The wrap deformer was something that I didn’t learn about while I was going to school, but instead something I only learned about recently. It is an incredibly useful tool that can help add an extra dimension to characters and animation.

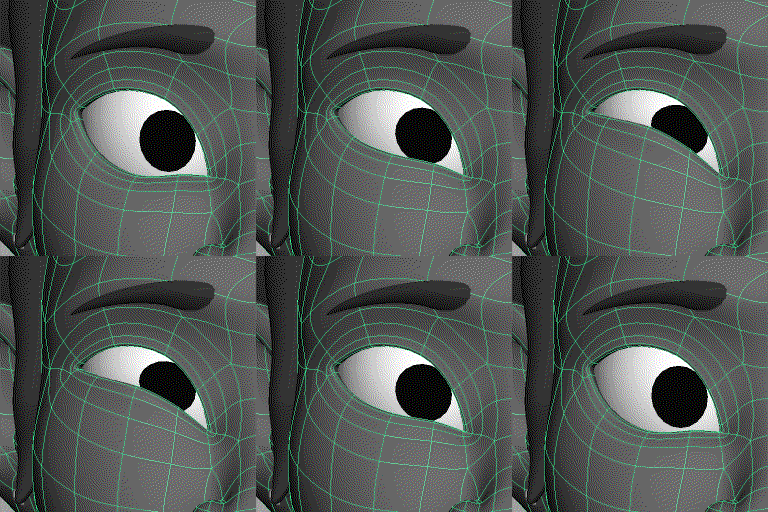
What the wrap deformer essentially is (atleast to my untrained eye in character rigging), is a way to have geometry influence an object seperate from it. It’s influence is based on proximity. What it effects is not the object as a whole, but the vertices; or in this particular case the lattice of another object.

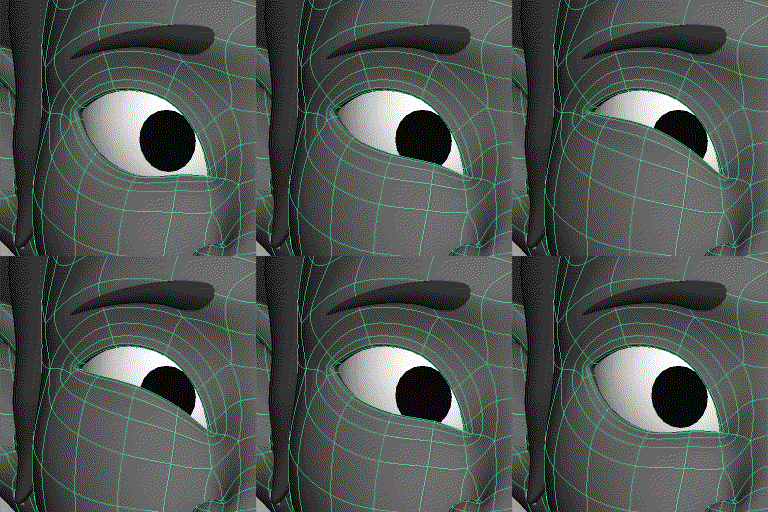
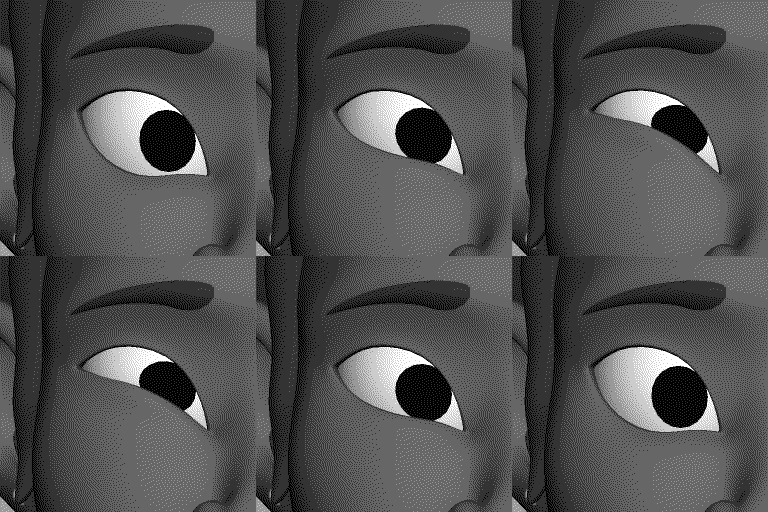
This is an example of an eye from a character in our new show. The details on how wraps work exactly would be best read in the book I linked too in an earlier post:

Which you can find here

And here’s how it looks without a wrap:

What a difference!

Once you start to use the process it becomes quicker to make. Some important things to remember is that the object which is the deformer will not render, so it’s good to have a second head as the deformer, and make it affect a blendshape to go to the real eye.

This of course isn’t just limited to eyes but also teeth and anything else you can think of that you want to add some motion too.

We’re looking for an animator!

December 7, 2010

We’re looking for a local (North Carolina – Triangle area) Maya character animator for a 3 month freelance gig starting January 15th. We’d like someone who is/has:

  • fluent in Autodesk Maya
  • facial animation and lip sync skills
  • solid understanding of animation principals (Arcs, Anticipation, Timing, etc.)
  • open to changes in direction when needed
  • team player
  • detail oriented
  • If you have all that and rigging experience, it’ll put you over the top.

    If you’re interested, please email me at jayheinz@unc.edu with a copy of your resume and a link to your portfolio.  You’ll need to work on-site in our secret lair, so brush up on your ninja skills.

    Changing the Sweet Spot

    December 1, 2010

    With each production we learn a little more about the trends in the industry. One thing that has made itself clear is that tilted domes require consideration when picking the sweet spot for viewing fulldome video. You want the bulk of your content to show up in or around this sweet spot. If something is produced for a flat dome, the sweet spot would be about 45 degrees up from the spring line, and the horizon just visible around 5 degrees. This works nicely to create a natural feeling as viewers sit back and experience the content in a flat dome.


    However, if you take that same content and place it in a tilted dome the audience feels as though they’re perpetually looking down a hill, and creates a kind of mental confusion that breaks the immersion.

    In order to resolve this problem, we shift everything up about 15-20 degrees. This creates a natural feeling for most tilted domes, and doesn’t disrupt the viewing experience of flat dome viewers when they sit back in tilted chairs.

    To help us keep this in mind we created an overlay to use while viewing our animatics to make sure we don’t stray too far from the ideal sweet spot and framing of content.