Magic Tree House: Space Mission in the bag

March 11, 2010

mth2

We just finished up our second full dome show called Magic Tree House: Space Mission. The show is based on the popular children’s book series Magic Tree House and is written by Will Osborne. We’ve been showing an analog version of MTH at Morehead since 2004 but it’s so popular that we decided to convert it to digital.

The audio track remains similar, although we added a few new SFXs, switched out one of the main character’s V.O.s and mixed it in 5.1 surround. But we didn’t do a typical digital conversion for the visuals. We essentially rethought the visuals from scratch, making the show much more interesting to watch and utilizing the full capacity of fulldome video.  The trailer is coming soon!

Final sound mix tips

February 18, 2010

We just finished production on our latest show, Magic Tree House: Space Mission and now it’s time for the surround mix. While we usually do the sound design in-house, we decided it would be much more efficient and cost effective to send off our surround mix to an outside house. So we send it off to Alex Markowski at Audio Kitchen Post who does a mix in his studio and then comes over to our dome, plugs into our surround speakers (and brings his own) and does a final mix.

If you’re new to producing digital content and don’t know some of the details of what to do once you’ve finished the sound design (or if your surround guy is new to planetarium mixing), here are some tips:

1. Exporting for the mix – OMFs

Because your sound mixer may not use the same platform or application that you used to do sound design, you’ll probably be asked to export an OMF.  You may be thinking, “WTF is an OMF?” An OMF is basically all of your sound clips and timing information in a generic format that other programs can use in one large file. Your mixing person can take this file, import it into his application and tweak away.  *IMPORTANT* – Apple’s Soundtrack does NOT export as OMFs (it does export AAF’s but that’s a different story). I’d suggest just using another program if you’re using a Mac such as ProTools LE, Logic or even just Final Cut.

Before you export, make sure your tracks are organized in groupings (dialog, VO, music, sfx). Levels, pans and filters cannot be exported as part of an OMF so it is important to have a….

2. Guide Track

When you send your mixer your video domemaster for reference (make sure it’s not 4K or it’ll be a pain in the butt – shrink it down to 1K), export your audio (the guide track) as an aiff and attach it to the video or send it as a separate file so that the mixer has a good sense of what you’re trying to make the audio sound like.

3. VO in the dome

Normally when you mix VO for 5.1 surround in a movie theater, you put the voice in the center channel and then just a bit in the left and right. However, in the dome, it’s usually good to bring the VO up in the left and right (about -3db from the center level). This way, when sitting in the left part of the theater, it prevents the VO from sounding like it’s coming from the right part of the theater and vice versa. Let your surround guy know.

4. Do the final mix in a dome

Don’t trust your headphones or your fancy-schmancy Alesis monitors. Things sound very different in the dome. There’s a lot more reverb and subtle sounds can get totally lost, especially in a big dome. Have your sound guy set up a computer in the dome and plug it into your surround system or set up his own speakers. That way you’ll get the real deal.

5. The Final Files

Here’s what you need from the final mix:

  • 5.1 surround mix (6 files – Center(C), Front Left(L), Front Right(R), Back Left (Ls), Back Right (Rs) and Low Frequency (Lf))
  • stereo mix (2 files – L and R)
  • a 5.1 dialog and M&E (music and effects) mix  – this is so you can hand it off to a planetarium in a country that speaks another language and they can replace the dialog track with their native language.

Is there anything else you’ve had to deal with or keep in mind? If so, let us know and we’ll add to the list.

Designs of the Future

February 15, 2010

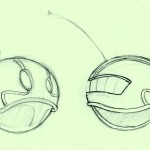
As we get deep into preproduction and asset creation for our next Fulldome show, a key piece of equipment they’ll be using in the reality we create is their ship. After a long period of distilling down ideas from classic rockets, to the more realistic shuttles… We settled on something reminiscent of a fighter jet mixed with a flying saucer. ShipSketchblockedOut

The big issue we’ve been considering is scale… Just how big should it be. Originally the thought was that it shouldn’t be much bigger than the existing shuttles that go into space. But proportionately the cockpit would have been just under 18 feet wide as displayed in this first drawing.

ChairShipcockpit01

We quickly blocked out the dimensions and started some camera move tests. It was just feeling too cramped. So we went bigger.

Cockpit_conceptSketch02

Changing the diameter of the cockpit to something closer to 30 feet gave us a lot more space for the characters to be able to move around, and allow our camera to move a little nicer through the scene. With larger more graceful motion paths.  Also allows us to mix up where the characters will be standing in the environment, and giving us a little more bang for our buck. Who says you can’t fly a skyscraper of a ship into space… it’s the future, right?

We’ve finally gone digital in our dome.

January 29, 2010

We’re putting the finishing touches on converting our theater to a 4K digital fulldome system from SkySkan. As far as I know, we’re now the largest fulldome theater in the Southeast US. We’ve been waiting for this day since I started working here three years ago. And it’s been talked about for over 10 years! In fact, it’s been so long that the guy who started talking about 10 years ago, Holden Thorp, was then the director of the Planetarium. Now he’s the Chancelor of the entire school of UNC-Chapel Hill.


Our official reopening is going to be February 5th. On the docket is “Astronaut” from NSC and “Black Holes: Journey into the Unknown” from Museum Victoria. We’ll also be playing our own homegrown show, “Earth, Moon and Sun” and a live show called Carolina Skies. We’ve also got the Domefest 2009 shorts that we’re going to play during special occasions AND we’re weeks away from finishing our second show, “Magic Tree House: Space Mission” and a domefest short entitled “Jeepers Creepers.”  Yeah, it’s a bit busy, but we’re pretty psyched.

Character Sketches

January 11, 2010

Starting on our new show, we begin with our most favorite (mine anyways) portion of the production process:


Pre-Production!


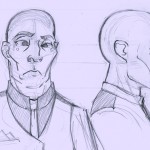
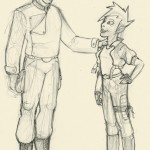
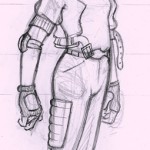
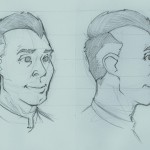
With our script getting a coat of finishing wax, our characters have been essentially locked down. With no major changes to be made to them, we can begin our character sketches! The following are some examples of our rough character concepts. The next step would be to make more locked down turn-arounds when we move onto the modeling in our 3d program of choice.


Sound Design?

January 7, 2010

41pBhfgzCoL._SL500_AA240_Because dome shows are mostly 3D animation, making planetarium shows is closer to creating cartoons or video games than live action films. Therefore, most of the sound effects have to be added in after the visuals are created. The arrangement and layering of these sounds is called sound design.

I was looking to get a little more education on doing sound design for film, whether it be from a class, books or some old sound guru who lives on a mountain top somewhere. It’s not easy to find info out there. And I work on a University campus, so you’d think there’d be some resource available. Nada. Nothing. If anyone has any thoughts or suggestions, lay it on me. I’m not talking the basics of audio editing, I’m talking full-on film sound design.

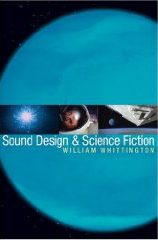
One book I did find that was interesting, however, is “Sound design & Science Fiction” by William Whittington. It basically talks about the evolution of sound design and how the 70s sci-fi movies such as THX-1138, Star Wars, Alien and Blade Runner revolutionized the business. And pretty much the leader in the revolution was Lucasfilm’s Ben Burtt. Thirty years later, he continues to be the leader in the biz – he did the sound for Wall•E. If you’re interested more in the sound design and foley work that was done for that film, check out this talk he gave about it as well as this website – Ben Burtt Interviews.

Awesome After Effects tutorials

January 4, 2010

The following is a wonderful source for after effects ideas, and production assets. If you’re making full dome content chances are you’re using Adobe after Effects because of its support for 4k compositing, and because its fairly easy to use. Andrew Kramer has a quirky sense of humor in all of his tutorials, but also does a great job explaining process, and some excellent design ideas and procedures. Anyone who’s asked me questions about understanding the program I usually point them to this link.

and for good measure, http://videocopilot.net/

The tutorials have been free, but some of his production bundles are worth taking a look at. For someone new to After Effects there are some great starter tutorials, and for some of us more advanced types he’s always coming out with some new and challenging material.


LowPoly Model for High poly crowd

December 7, 2009

We’re working on an experimental short that is designed to help us break the daily grind of working strictly on planetarium shows. The short is intended to be entered at DomeFest. An interesting challenge has arisen as we try to generate a crowd that should ultimately cover the dome surface.

My number one priority was to make sure the object that was to be duplicated thousands of times was as lowpoly as I could get it. LowPoly, reffering to an amout of the shapes known as polygons that define the shape of a computer generated model.

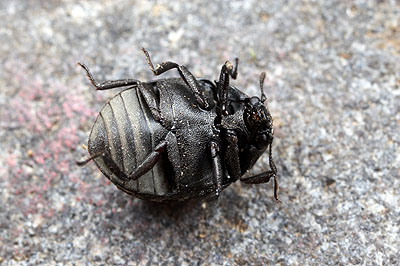
The resulting insect is based upon the anatomy of a pill beetle.

bugRendered

This doesn’t look like much up close, but its intent it to be very small. I was able to make this bug for less than 1000, polys.

bugWireframe

But when you’ve got 5000 on the screen at one time, then you’re talking about close to 5 million polygons, all being animated. The bugs legs and antenna had to move. We couldn’t just have them sliding around being pushed or dragged by some imaginary force. All of that information can cause some instability in the scene, so to make life even easier I worked with smaller crowds and plan to layer them up to appear as one large crowd in the final composite.

This  one bug was duplicated multiple times and simulated in a crowd simulation.


The Following animation is a short test showing a crowd of 500 bugs approaching a dome structure.


Trax Editor and Time Warps: Part 2

November 24, 2009

So in part one we created the walk cycle and our character set. Now it’s time to bring that cycle into the trax editor!


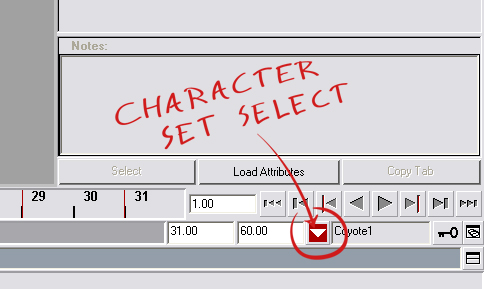
First we want to make sure our character set is selected. You’ll want to click and hold onto that down arrow button to the right of your timeline length numbers.

CharacterSetSelect

The selected character is shown to the right of that, as evident through the screenshot. Something to note is that I forgot I had an object or control already named Coyote, so maya automatically added a 1 after it. It’s ok and shouldn’t affect anything that we’ll be doing. I left that mistake in there to let you know that it would still be ok if you accidentally did the same.

Now that we have our character set selected, it’s time to make that cycle actually cycle! Your trax editor probably still looks like what it did before. All we see is a soundtrack. To be able to see our new character in the trax editor we have to load it. With your character set selected (check the bottom right), press the Load Selected Character button found here:

TraxEditorLoad

TraxEditorCharEmpty

A layer has been created inside of the trax editor, with the name of our character set. It can’t be seen yet, but this is where our cycle will be kept in. With our character set still being selected (bottom right arrow still red with the name of your character set written), go to:

Create > Animation Clip > Dialogue Box

TraxEditorAnimationOptions

This presents us with some new options!

CreateClipOptions

The name is what we want to call the clip. In this case its a walking animation, so I just use Walking. The next important option is to choose where to put the clip. How trax editor works is by keeping the clips we create in what’s called the Visor.

Since we want to use the clip already, we can skip that extra step of dragging and dropping from the visor, and let the clip be put into the trax editor for us. The time range is how long the cycle is. If you know what your frame range is you can specify it here.

TraxEditorClip

Sweet! Now we have our cycle! All the keys you have on your character should have disappeared, and we now have our clip in the trax editor! Now if you were to extend the timeline so that its longer than your clip, you should see that.. it still stops after the first one! That’s because we have to extend the clip so that it can cycle! There’s a couple different ways to do that. You can do it in the trax editor, or by selecting the clip in the trax editor, and bringing up your attribute editor (alt-a).

Let’s say we want our Coyote clip to extend 100 frames. We can do that by moving our mouse to the right hand side of the clip in the trax editor, holding shift, and then clicking and dragging. What it does is add more Post Cycle‘s, which is how you would extend it via the attribute editor.

ClipAttributes

Now the bulk of the work is out of the way. Unfortunately that doesn’t mean it’s time for the easy part. Next installment is going to be the actual use and practice of using the time warp. Things are only going to get more confusing from here on out, but bare with me and it’ll be hopefully worth it in the end! Stay tuned!

Trax Editor and Time Warps: Part 1

November 23, 2009

This isn’t directly dome related, but I thought I’d post about it anyways. I ran into a recent problem in Maya having to do with the trax editor. I wasn’t that well-versed in the trax editor’s inner-workings, so there was a steep learning curve for me. I wanted to write about what I learned, so that someone else who hasn’t ever used the trax editor, might get that extra step in the right direction.


Non-Linear Animation

These are the fancy words used to describe the purpose of the trax editor. It may be a little confusing at first, but it basically just means cycles.

Linear

NonLinear

So now that we can establish the difference between Linear and Non-Linear animation, we’ll have to think which would suit us best for what it is we want to do. In my case I was needing to have a character walk. This is perfect for cycles, so Non-Linear animation is the way to go. Trax editor here I come!


But first we need a walk cycle!


Here we go! Just threw together this walk cycle very quickly as an example of what you may have.

Coyote

This was a quick walk cycle I threw together as an example of what you may have.  Coyote’s feeling pretty good about himself, and rightfully so! What we’re going to do is turn him into a:


Character Set

In Coyote’s particular case, his cycle is 31 frames long. Your cycle is most likely different from this length, so you’ll just want to remember to adjust the numbers so that they’ll fit your own animations. What we’ll want to do is open the Trax Editor. You can open it if you haven’t already by going to:

Window > Animation Editors > Trax Editor

You’ll be presented by this lovely window:

TraxEditorBlank

Now that we have Trax Editor open, its time to select our character so that we can make that character set! You’ll want to select everything that has a key on it. In Coyote’s case, it’s the curves that are used to control his joints.

CoyotePreSelectCoyoteSelect

Now that we have everything with keys selected, it’s time to turn him into our Character Set. We can do this by going to the trax editor and clicking:

Modify > Create Character Set > Dialog Box

TraxEditorCharacterSet

What this does is present us with our options for our character set.

CharacterSetOptions

So the important thing is to give your Character Set a name. It can be whatever you’d like it too be. In this case I called it Coyote. The other options depends on what you’d want. Usually the default is the way to go. If you also keyed the scale, you’ll want to be sure to uncheck that one. I’ve left mine how you see it here. After you hit ok, you shouldn’t need to touch your controls or joints again!

Now that we have our character set created, we can move onto to making the cycle in the trax editor, which is continued in part two!